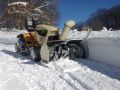
Looked at the Agri-Fab and other competitors tow behind units, but even bigger to store when not in use, and all the negatives of a trailer when spreading. Then got to looking at the various electric spreaders... Most of them were similar, intended to be mounted on an ATV, but seemed to be Chinesey and of questionable quality. Along with the other uncertain quality units, I happened upon a "Fimco" brand electric spreader, which looked to be USA made. They make various models including a Cat 1 hitch model, but the ATV model they had was the right size. The Cat 1 model was just too big, with a big price tag to go with it.
The Fimco ATV model was around $300 with shipping at various interweb sites, but got it to my door for $280 through Jet.com with a coupon they had. Picture, as out of the box...
- Fimco, as-built.JPG (751.21 KiB) Viewed 8601 times
- Fimco, back with mounting rails.JPG (701.24 KiB) Viewed 8601 times