Pulling top shaft will run $75 - 80. 2/3 gear set runs about $130. 1/R gear set is a little less. Should be able to find good used ones a lot cheaper. Unless you are wanting to change
gear ratios. I don't think the aftermarket even makes the stock type 1st/Rev top gear (no reason to). They make it so that reverse stays the same speed but 1st can be speeded up for a better ratio for pulling. This requires aftermarket shift forks, or modifying the stock ones.
There are several guys around who part these transmisions out and pullers throw a lot of these parts away. So used stuff shouldn't be hard to find. I probably have several sets of stock gears laying around myself.
That input pinion gets plenty of lube. On one of my pullers, I replaced the seal and bearing with a sealed bearing. Every time I park it, it leaves a little puddle from the fluid leaking around the outside of the bearing. Pullers do this to be able to easily change that pinion shaft. The aftermarket make a pinion that has 1 extra tooth that speeds the trans up just slighlty. This allows tuning the speeds for various track conditions. It can be easlily swapped out at the track.
Gear transmission evaluation for rebuild
Forum rules
This section is reserved for semi detailed posts describing how you made a custom tool, or a detailed procedure for repairing a certain assembly of a tractor. Pictures are pretty much required
Posts in this section now have to be approved before they become visible.
If your looking for help repairing something please post in the shooting the breeze or the forum that pertains to your question.
-
Farmallgray

- Posts: 1021
- Joined: Mon Sep 06, 2010 7:39 am
- First and Last Name: Todd Markle
- Location: Spring Mills, Pa
Re: Gear transmission evaluation for rebuild
See my IH, Cub Cadet and tractor pulling youtube videos;
http://www.youtube.com/user/farmallgray
http://www.youtube.com/user/farmallgray
-
Dave C
- Web Developer
- Posts: 1014
- Joined: Mon Sep 06, 2010 7:12 am
- First and Last Name: David Chester
- Location: Wallingford, CT
Re: Gear transmission evaluation for rebuild
I just remembered i got a 126 trans here.... its prob in 10 times better shape than yours. i could strip it down and flat rate all the internals to you. 75 plus ship. not sure what a large flat rate costs to canada tho.
dave
dave
Trying to save cubs... one at a time.......
-
PTWannaHave
- Posts: 295
- Joined: Wed Apr 11, 2012 12:39 pm
- First and Last Name: Ben Michaud
- Location: Richmond, Ontario
Re: Gear transmission evaluation for rebuild
Thanks for the info/advice!Farmallgray wrote:That input pinion gets plenty of lube. On one of my pullers, I replaced the seal and bearing with a sealed bearing. Every time I park it, it leaves a little puddle from the fluid leaking around the outside of the bearing. Pullers do this to be able to easily change that pinion shaft.
While I wait for my Input & Top shafts situations to sort out, I think I'm ready to start tinkering with Preload and Backlash. I have put the tapered roller bearing outer races in the freezer; hoping that they will just drop into their carrier housings instead of having to press fit them in...
The two bearings that hold the Counter (Pinion) Shaft are pressed fitted... It is my understanding that for adjusting backlash, one might have to install/uninstall that shaft a few times (playing with shims in-between) to get it right. Any tips on performing that with the least amount of aggravation?!
Thank-you in advance,
PTWannaHave
-
PTWannaHave
- Posts: 295
- Joined: Wed Apr 11, 2012 12:39 pm
- First and Last Name: Ben Michaud
- Location: Richmond, Ontario
Re: Gear transmission evaluation for rebuild
- Starting reassembly
As you can see above, I'm setting up to test Preload. Having to take that left bearing on/off to remove the diff from the housing is a pain; the bearing fits too tightly to install & remove by hand...
Where do you hook up the scale, exactly, when measuring resistance? (The manual's pic I have is not great at all; I can't see figure it out...)
Any thoughts/tips on the least aggravating way to setup backlash?
Thank-you in advance,
PTWannaHave
-
PTWannaHave
- Posts: 295
- Joined: Wed Apr 11, 2012 12:39 pm
- First and Last Name: Ben Michaud
- Location: Richmond, Ontario
Re: Gear transmission evaluation for rebuild
OK, well... Install of rear diff with shims as they were prior to disassembly, and with new bearings, cause a preload pressure of 9-11lbs. So, I need to add (NLA) shims... Hmmm... My best idea so far is to cut some out of gasket paper. Having 1-2 paper shims and 4 metal ones of varying width will hopefully bring me to the correct pressure.
Any other ideas?
Any other ideas?
PTWannaHave
-
Farmallgray
- Posts: 1021
- Joined: Mon Sep 06, 2010 7:39 am
- First and Last Name: Todd Markle
- Location: Spring Mills, Pa
Re: Gear transmission evaluation for rebuild
Paper gasket material is probably to thick. Get in touch with one of the guys who part them out or Midwest Super Cub for shims.
See my IH, Cub Cadet and tractor pulling youtube videos;
http://www.youtube.com/user/farmallgray
http://www.youtube.com/user/farmallgray
-
Dave C
- Web Developer
- Posts: 1014
- Joined: Mon Sep 06, 2010 7:12 am
- First and Last Name: David Chester
- Location: Wallingford, CT
Re: Gear transmission evaluation for rebuild
Ben,
Your box will go out monday, it has some shims from the 126 tranny.
I usually take about a 4 foot peice of rope and wind it around the carrier and then pull on it with the scale...
After you get your preload now its just a matter of moving them right to left or left to right. Also you have to deal with the tooth contact height first by moving the pinion in and out with the shims up front. Its a Huge PITA! you need lotsa patience.
Most of the trannys i have dealt with i was able to get the carrier in and out of the housing without having to pull one of the bearings off....but there is one in 5 it seams like that just wont go.
Luckily after you get your preload you just have to remove it and install it one more time.
dave
Trying to save cubs... one at a time.......
-
Farmallgray
- Posts: 1021
- Joined: Mon Sep 06, 2010 7:39 am
- First and Last Name: Todd Markle
- Location: Spring Mills, Pa
Re: Gear transmission evaluation for rebuild
Dave,
On the ones that are hard to get in and out just do a little grinding till they go in and out easier. I helped a friend put in a Midwest billet carrier and we had to do a good bit of grinding
to get it in and out. It doesn't take as much as you would think at first though.
On the ones that are hard to get in and out just do a little grinding till they go in and out easier. I helped a friend put in a Midwest billet carrier and we had to do a good bit of grinding
to get it in and out. It doesn't take as much as you would think at first though.
See my IH, Cub Cadet and tractor pulling youtube videos;
http://www.youtube.com/user/farmallgray
http://www.youtube.com/user/farmallgray
-
PTWannaHave
- Posts: 295
- Joined: Wed Apr 11, 2012 12:39 pm
- First and Last Name: Ben Michaud
- Location: Richmond, Ontario
Re: Gear transmission evaluation for rebuild
Thanks guys, and many thanks to Dave C for selling and sending me parts! 
While I wait for shims, I made some gasket paper one yesterday and did get the preload to 3.5-4.5 lbs. I suppose that if that is as it good as it gets, it won't be too bad... Yeah, what an exercise in patience it is!!
(And, I'm not done yet... I hope the backlash setting exercise won't be as trying... Btw, what is the most common off-the-shelf material/compound for 'painting' the gears to observe backlash?)
I won't get back to this sub-project until next weekend, after hopefully picking up my parts from Dave on Friday. (This tranny WILL NOT BE for sale after I'm done!! )
)
While I wait for shims, I made some gasket paper one yesterday and did get the preload to 3.5-4.5 lbs. I suppose that if that is as it good as it gets, it won't be too bad... Yeah, what an exercise in patience it is!!
- Checking Preload
I won't get back to this sub-project until next weekend, after hopefully picking up my parts from Dave on Friday. (This tranny WILL NOT BE for sale after I'm done!!
Last edited by PTWannaHave on Sun Apr 07, 2013 3:25 pm, edited 1 time in total.
PTWannaHave
-
Farmallgray
- Posts: 1021
- Joined: Mon Sep 06, 2010 7:39 am
- First and Last Name: Todd Markle
- Location: Spring Mills, Pa
Re: Gear transmission evaluation for rebuild
Prussian Blue is what the pros use. You should be able to get a small tube at an auto parts store. Some types of grease will work as long as they are fairly opaque.
This might help;
http://www.ringpinion.com/Content/Book/ ... tterns.pdf
This might help;
http://www.ringpinion.com/Content/Book/ ... tterns.pdf
See my IH, Cub Cadet and tractor pulling youtube videos;
http://www.youtube.com/user/farmallgray
http://www.youtube.com/user/farmallgray
-
PTWannaHave
- Posts: 295
- Joined: Wed Apr 11, 2012 12:39 pm
- First and Last Name: Ben Michaud
- Location: Richmond, Ontario
Re: Gear transmission evaluation for rebuild
If anyone needs instruction on how to pack oily tranny gears for undamaged USPS shipping, pls. get a hold of Dave C...!!PTWannaHave wrote: ...many thanks to Dave C for selling and sending me parts!
If I had not received those parts, I would have (had to) ground down the main shaft where it goes into the rear needle bearing. I had found an excellent heavy-duty needle bearing with a smaller 5/8 id: Koyo Torrington HJ-101812 (with oil hole). Still would like to use it, but I can't now justify spending $65. to grind down a shaft in good condition. I'll return the $14. bearing instead. (Perhaps some day, I'll own a metal lathe that can handle hardened steel...?)
PTWannaHave
-
Farmallgray
- Posts: 1021
- Joined: Mon Sep 06, 2010 7:39 am
- First and Last Name: Todd Markle
- Location: Spring Mills, Pa
Re: Gear transmission evaluation for rebuild
Do you have a lathe now? I made a bracket for mine to mount a die grinder to the tool post. I did it for grinding valves, but I have found other uses for it as well.
- Attachments
-
See my IH, Cub Cadet and tractor pulling youtube videos;
http://www.youtube.com/user/farmallgray
http://www.youtube.com/user/farmallgray
-
PTWannaHave
- Posts: 295
- Joined: Wed Apr 11, 2012 12:39 pm
- First and Last Name: Ben Michaud
- Location: Richmond, Ontario
Re: Gear transmission evaluation for rebuild
Nifty contraption, FarmallGray! Clarification: I do not own a lathe of any kind.
Following are pics of my old tranny parts to compare with the newsed ones I received:
Bye for now,
Following are pics of my old tranny parts to compare with the newsed ones I received:
- My original on the right...
- My original input shaft
- Received input shaft
- Main shafts at the needle bearing
PTWannaHave
-
PTWannaHave
- Posts: 295
- Joined: Wed Apr 11, 2012 12:39 pm
- First and Last Name: Ben Michaud
- Location: Richmond, Ontario
Re: Gear transmission evaluation for rebuild
OK... I've gotten rid of my gasket paper shims and reset the preload of the diff with all metal shims.
Installed the countershaft with all gears, spacers and bearings. (I found that to be a bit tricky...) Now ready to put diff back in and check for backlash. Chances are the pionion shaft will need to be moved frontwards or backwards with the shims of the front bearing... Since the shaft is installed, its nut torqued properly, the bearing cage nuts also torqued properly, what is the easy way to add or remove shims? (The front bearing is pressed on the shaft, the bearing is a very tight fit into its cage, and the bearing cage is pressed into the housing. Seems like it will be a pain to add|remove one shim at a time, re-torque, and check backlash...??!! )
)
Installed the countershaft with all gears, spacers and bearings. (I found that to be a bit tricky...) Now ready to put diff back in and check for backlash. Chances are the pionion shaft will need to be moved frontwards or backwards with the shims of the front bearing... Since the shaft is installed, its nut torqued properly, the bearing cage nuts also torqued properly, what is the easy way to add or remove shims? (The front bearing is pressed on the shaft, the bearing is a very tight fit into its cage, and the bearing cage is pressed into the housing. Seems like it will be a pain to add|remove one shim at a time, re-torque, and check backlash...??!!
PTWannaHave
-
Farmallgray
- Posts: 1021
- Joined: Mon Sep 06, 2010 7:39 am
- First and Last Name: Todd Markle
- Location: Spring Mills, Pa
Re: Gear transmission evaluation for rebuild
I usually polish the pinion shaft with emery cloth so the bearing will slide on and off easily.
See my IH, Cub Cadet and tractor pulling youtube videos;
http://www.youtube.com/user/farmallgray
http://www.youtube.com/user/farmallgray
-
Dave C
- Web Developer
- Posts: 1014
- Joined: Mon Sep 06, 2010 7:12 am
- First and Last Name: David Chester
- Location: Wallingford, CT
Re: Gear transmission evaluation for rebuild
Ben,
Glad your happy with the parts! i told you you needed a parts tranny! between the bearings shafts gears and shift rails u prob saved a ton!
If i opened a tranny that was that bad id probably drop it off on the barge to go to china to make cheap tools and junk cars and used a different one. but there probbably harder to find around your parts.
I have done a bit of shipping over the years... only had one problem with a hydro trans that i think somehow leaked oil out of the bag and soaked the box till it fell apart..... now i double or tripple bag pumps!
dave
Trying to save cubs... one at a time.......
-
PTWannaHave
- Posts: 295
- Joined: Wed Apr 11, 2012 12:39 pm
- First and Last Name: Ben Michaud
- Location: Richmond, Ontario
Re: Gear transmission evaluation for rebuild
Yup, beggars can't be choosers...!Dave C wrote:...If i opened a tranny that was that bad id probably drop it off on the barge to go to china to make cheap tools and junk cars and used a different one. but there probbably harder to find around your parts.
I may have gotten lucky with my 1st fitment try for backlash setting... I didn't find the blue stuff from the bearing shop all that great; I thought it would have been more pasty...
- Bearing Blue (Prussian Blue?!)
I put the tranny on its side, dripped some Blue over 1/4 of the diff teeth on one part of the ring, and the same on the opposite side. Spun the shaft lots in both directions, with and without some resistance on the diff. Here are the results (a bit difficult to get good pics...):
Thanks,
PTWannaHave
-
Dave C
- Web Developer
- Posts: 1014
- Joined: Mon Sep 06, 2010 7:12 am
- First and Last Name: David Chester
- Location: Wallingford, CT
Re: Gear transmission evaluation for rebuild
I would have to double check the book but im 90 percent sure were concerned with the pinion not the ring. application of the prussion blue should be to the pinion and observered tooth contact of the pinion teeth. i will look again tonight.
Trying to save cubs... one at a time.......
-
PTWannaHave
- Posts: 295
- Joined: Wed Apr 11, 2012 12:39 pm
- First and Last Name: Ben Michaud
- Location: Richmond, Ontario
Re: Gear transmission evaluation for rebuild
Hmmm... I guess that would mean removing the diff yet again...?
FarmallGray had provided a pic of a diff ring earlier in the thread about checking teeth meshing...
Have a great Easter all!
FarmallGray had provided a pic of a diff ring earlier in the thread about checking teeth meshing...
Have a great Easter all!
PTWannaHave
-
Farmallgray
- Posts: 1021
- Joined: Mon Sep 06, 2010 7:39 am
- First and Last Name: Todd Markle
- Location: Spring Mills, Pa
Re: Gear transmission evaluation for rebuild
The book does say the pinion, but unless you have some kind of scope, you can't see it unless you take the carrier out. I do have a scope and I use it to verify, but I read the pattern on the ring gear to make the adjustments.
See my IH, Cub Cadet and tractor pulling youtube videos;
http://www.youtube.com/user/farmallgray
http://www.youtube.com/user/farmallgray
-
Klapatta
- Posts: 1363
- Joined: Mon Sep 06, 2010 2:25 pm
- First and Last Name: Kenneth LaPatta
- Location: Rockingham VT.
Re: Gear transmission evaluation for rebuild
The service manual instructions can be both confusing and deceptive. There, I said it 
There was a discussion between Todd and myself roughly three years ago about this and I recorded some of his images.
I have personally found the best way to establish true carrier preload is with the pinion shaft removed. By adding or subtracting shims until proper preload is obtained that shim pack represents a constant value that must be maintained regardless of final placement left or right to obtain tooth backlash. It's best to measure each shim with a mic and then record their total on paper because the mind can betray you
Pinion gear location should be set toward the center of the ring gear as shown in Farmallgrey's image that he sent me at the time. Notice how the Prussian blue is high at the lower and upper edges of the teeth, I have highlighted them in pencil in the shot. Also, the contact patch is neither too high at the tooth crest nor too low at the tooth root. The view depicts a straight tooth ring gear however the principle remains the same.
I do not consider gasket shims a wise choice, as already stated that's what parts rear ends are for, and one that is packed with .004's and 007's should be considered as a home run 
There was a discussion between Todd and myself roughly three years ago about this and I recorded some of his images.
I have personally found the best way to establish true carrier preload is with the pinion shaft removed. By adding or subtracting shims until proper preload is obtained that shim pack represents a constant value that must be maintained regardless of final placement left or right to obtain tooth backlash. It's best to measure each shim with a mic and then record their total on paper because the mind can betray you
Pinion gear location should be set toward the center of the ring gear as shown in Farmallgrey's image that he sent me at the time. Notice how the Prussian blue is high at the lower and upper edges of the teeth, I have highlighted them in pencil in the shot. Also, the contact patch is neither too high at the tooth crest nor too low at the tooth root. The view depicts a straight tooth ring gear however the principle remains the same.
-
Farmallgray
- Posts: 1021
- Joined: Mon Sep 06, 2010 7:39 am
- First and Last Name: Todd Markle
- Location: Spring Mills, Pa
Re: Gear transmission evaluation for rebuild
Ben,
You have to hold some pressure on the gears as you rotate them. That will rub the blue off in where the main contact is. You can see that in my pic that Ken posted.
You have to hold some pressure on the gears as you rotate them. That will rub the blue off in where the main contact is. You can see that in my pic that Ken posted.
See my IH, Cub Cadet and tractor pulling youtube videos;
http://www.youtube.com/user/farmallgray
http://www.youtube.com/user/farmallgray
-
PTWannaHave
- Posts: 295
- Joined: Wed Apr 11, 2012 12:39 pm
- First and Last Name: Ben Michaud
- Location: Richmond, Ontario
Re: Gear transmission evaluation for rebuild
Thank-you very much for the input guys!
I hope to return to this project soon, but unlikely until next week... As winter wanes, I will be spending less & less time in the shop... But, I'd like to 'complete' this tranny before my 'forced' summer break. (Too busy with outside fun & chores in the warm weather to have time left for shop projects...)
I will perform another test, adding even more resistance (than I already have) to the diff when spinning the pinion shaft. We'll see if I observe more readable marking on the ring gears. (A scope to view/read the pinion teeth would be nice, but I will pass on obtaining one for this project...)
Bye for now,
PTWannaHave
-
PTWannaHave
- Posts: 295
- Joined: Wed Apr 11, 2012 12:39 pm
- First and Last Name: Ben Michaud
- Location: Richmond, Ontario
Re: Gear transmission evaluation for rebuild
Alright... I added more pressure to the diff when checking backlash (teeth meshing), and I am still happy with the results. Great, now on to the main shaft, sliding gears, shift rods and forks. All went in well, a little tricky to keep the steel balls in place while driving the rods. Silky smooth operation with the new bearings!!
I'm waiting on a few parts to reassemble the reduction drive housing, and am tinkering with the idea of disassembling the shifter arm to replace its o-rings and clean & lube the whole assembly... Any tips or techniques for easiest disassembly? (The pin that goes through the shifter handle/rod is 'buried' inside the spring retainer; looks tricky to hold spring compressed while trying to drive out pin...)
Bye for now,
PTWannaHave
-
PTWannaHave
- Posts: 295
- Joined: Wed Apr 11, 2012 12:39 pm
- First and Last Name: Ben Michaud
- Location: Richmond, Ontario
Re: Gear transmission evaluation for rebuild
Got some gaskets today; should be able to play around this weekend...
Haven't had time to start the stick shift arm disassembly yet; any tips on servicing it?
If you need something to feel good about, we're getting eight inches of snow tonight/tomorrow...
Haven't had time to start the stick shift arm disassembly yet; any tips on servicing it?
If you need something to feel good about, we're getting eight inches of snow tonight/tomorrow...
PTWannaHave
-
Dave C
- Web Developer
- Posts: 1014
- Joined: Mon Sep 06, 2010 7:12 am
- First and Last Name: David Chester
- Location: Wallingford, CT
Re: Gear transmission evaluation for rebuild
the shifters are pretty easy to work on so long you know one key trick. The pin comes out easy there isnt much pressure on them. the hard thing is the indexing cup. you will need 2 umm like 3/4 open end wrenches... its fairly difficult to explain but if you insert one of the wrenches into the cup and then use a 2nd to pry the 1st wrench.... it takes some practice but doable... you need to keep working each side a little at a time... and i think at some point you need to swap the 2nd 3/4 wrench for like a 1 1/8 or something. i can take a picture if your confused... it works very slick. i think i need to thank farmallgray for that one.
dave
dave
Trying to save cubs... one at a time.......
-
PTWannaHave
- Posts: 295
- Joined: Wed Apr 11, 2012 12:39 pm
- First and Last Name: Ben Michaud
- Location: Richmond, Ontario
Re: Gear transmission evaluation for rebuild
Thanks Dave. But, maybe I do not need to remove the indexing cup? (Bowl with an 'H' on the underside.) All I was wanting to do is remove the 'stick' and its attached parts to clean, change seals (o-rings), repaint & lube. I was thinking the indexing cup could remain pressed in to the base plate, and I would just clean it.
Even though I looked at the parts diagram and tried to see inside the assembly under a light, I'm still a little fuzzy on how it's supposed to come apart... I'm sure any pics you have would be helpful.
Cheers,
Even though I looked at the parts diagram and tried to see inside the assembly under a light, I'm still a little fuzzy on how it's supposed to come apart... I'm sure any pics you have would be helpful.
Cheers,
PTWannaHave
-
Dave C
- Web Developer
- Posts: 1014
- Joined: Mon Sep 06, 2010 7:12 am
- First and Last Name: David Chester
- Location: Wallingford, CT
Re: Gear transmission evaluation for rebuild
Ben,
You must remove the indexing "H" cup to disassemble the shifter.
dave
You must remove the indexing "H" cup to disassemble the shifter.
dave
Trying to save cubs... one at a time.......
-
PTWannaHave
- Posts: 295
- Joined: Wed Apr 11, 2012 12:39 pm
- First and Last Name: Ben Michaud
- Location: Richmond, Ontario
Re: Gear transmission evaluation for rebuild
Ah... Too bad, thanks for the info; not as simple as I had hoped. Oh well... Looking forward to pics if you have any.
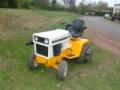
On the plus side, my transmission is now basically resurrected!
On the plus side, my transmission is now basically resurrected!
PTWannaHave
-
PTWannaHave
- Posts: 295
- Joined: Wed Apr 11, 2012 12:39 pm
- First and Last Name: Ben Michaud
- Location: Richmond, Ontario
Re: Gear transmission evaluation for rebuild
Got back to this tranny during the Christmas break... (I also got an engine 75% rebuilt last winter...)
- Ready for fine-cleaning and primer
- IMGP4829.JPG (1.05 MiB) Viewed 26646 times
- painted...
- IMGP4832.JPG (1.06 MiB) Viewed 26646 times
PTWannaHave