Adam - You might want to peruse the build thread I had for my most recent 2182 (which I have named 2182-2...).
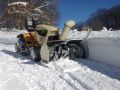
At any rate, when I got the tractor I discovered a cracked adapter housing where it mounts to the factory front tranny mounts. This is common on these machines, especially when the bolts that have been discussed are allowed to become loose.
In this thread I detail the task of tranny removal and replacing the adapter housing. I decided to add braces as I put it back together. Xtrememotorworks.com sells a bolt on set, but I decided to build my own for a lot less money. The merits of each and a discussion is in the thread.
Link to the 2182-2 build:
viewtopic.php?f=8&t=5282&start=60 This lands you on the page where I build the braces, but you might want to follow from the beginning if you get bored.
In case your not familiar, the 2072 is the same machine in most ways as this newer Super I worked on, so the same discussion applies to your rear.
All of the 3/8" bolts (9/16" hex head) in the rear should be torqued to 30 ft-lbs. In the thread I also discuss my thoughts on threadlocking, and due to the cyclical nature of the application I prefer Permatex #2 or #3 as they stay gummy. #2 is easier to work with, #3 is a more liquid version. All these bolts for the axle carriers (tubes) and tranny mounts should be checked with a torque wrench yearly (30 ft-lbs).